Hang Glider Association


 Warning! Building this wind sock requires the use of sharp tools, sewing machinery and intense heat. DO NOT attempt to follow these instructions unless you are able to do this safely, without hurting yourself or burning down your house.
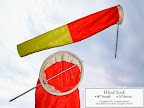
This wind sock is 60" long and has a 10" mouth. It's light weight but rugged and flies fully extended in less than a 15 mph wind, making it suitable for indicating takeoff or landing winds for foot-launched flying.
To make this sock, you'll need access to a sewing machine, a propane torch, and the following materials:
From the fabric store -
- 1 yard - 60" wide ripstop nylon, cut into two 30" wide panels. Two contrasting colors (bright yellow and orange, for example) is best, so you may want to buy a yard of each and make two wind socks.
- 1/2 yard - cotton canvas.
- 1 - small roll polyester thread (don't use cotton-core polyester, cotton or nylon thread - it won't hold up to the UV).
From the hardware store -
- 36" - copper tubing, 1/4" diameter refrigeration/plumbing type.
- 1 - 1/2" brass grommet kit (enough to make several socks).
- 1 - 5/16" zinc anodized or stainless threaded rod, 36" long.
- 4 - 5/16" zinc anodized or stainless jam nuts.
- 2 - 5/16" zinc anodized or stainless flat washers.
From the auto parts store -
- 1 - small spray bottle of Armor-All
- 2 - hose clamps big enough to clamp the threaded rod to whatever you want to clamp it to.
- A bit of rosin-core solder
windsock How to build a windsock FIGURE 1 https://picasaweb.google.com/111452602950004761770/January11201502#6102964352032146898 FIGURE 2 https://picasaweb.google.com/111452602950004761770/January11201502#6102964353209915330 FIGURE 3 https://picasaweb.google.com/111452602950004761770/January11201502#6102964364781551170 FIGURE 4 https://picasaweb.google.com/111452602950004761770/January11201502#6102964374782119762 FIGURE 5 https://picasaweb.google.com/111452602950004761770/January11201502#6102964379474801650 FIGURE 6 https://picasaweb.google.com/111452602950004761770/January11201502#6102964386808294466 FIGURE 7 https://picasaweb.google.com/111452602950004761770/January11201502#6102964390774440178


First make the ring for the mouth of the wind sock. Using an inexpensive tubing cutter or a fine-blade hack saw, cut the 1/4" copper tubing to 31 1/2" in length . Notch one end of the tubing with a pair of diagonal cutters as shown in FIGURE 1, then crush it with a pair of vice grip pliers to make a small plug that can be inserted into the other end to form a ring, 10" in diameter. Solder the ends together with the propate torch and rosin-core solder.
Cut the cover for the ring from the cotton canvas as shown in FIGURE 2, 6" wide by 32" long. Fold over and stitch the edges to finish. Check for fit by wrapping around the ring, pin, then sew the ends together as shown.
Now, cut the body of the wind sock from the ripstop nylon as shown in Figure 3. Optional: to reduce unravelling at the edges of the material, you can use a small soldering iron with a blade tip as a hot knife, rather than scissors. Use extreme caution not to burn yourself or the body of the material!
Assemble the body of the wind sock as shown in FIGURE 4. Sew in this order: a) large body panel to small body panel, b) finish seam between body panels, c) finish edge at the small end of the sock d) inside-out join the sides of the body panels, e) right-side out finish seam on the sock. Use straight pins to hold the pieces together before sewing to ensure straight seams.
Pull the canvas ring cover around the ring. Tuck the inside through the ring as shown in FIGURE 5. Using straight pins, pin the sock body between the two sides of the ring cover, bunching as necessary to take up any slack. Sew two seams around the circumference of the ring cover to join the body to the ring. Place another seam through the two sides of the ring cover as close as possible to the ring to hold it in place.
Using a pen or pencil, mark a position for a grommet through the ring cover at the bottom of the sock, about 1/2" from the seam and 3/4" back from the ring. Using a fabric tape measure (also from the fabric store) measure half-way around the ring in both directions to find the point exactly on the other side of the ring for the other grommet, and mark that, also about 3/4" back from the ring. See FIGURE 6.
Place the 1/2" grommets at the two points you marked, as instructed in the grommet kit.
Put the threaded rod through the bottom grommet. Assemble the jam nuts and washers as shown in FIGURE 7.
Finally, spray the outside of the completed sock liberally with Armor-All to provide some UV protection to the canvas and ripstop nylon.
All done! Allow the sock to dry, then use the hose clamps to attach the threaded rod to a fence post, or a pole made of conduit or pvc pipe.